New LED Down Lights

New LED Down Lights

Getting Cheaper And Better All The Time
 

  • Cheaper To Run
  • Cheaper To Maintain
  • Safer To Operate
  • Easy To Install
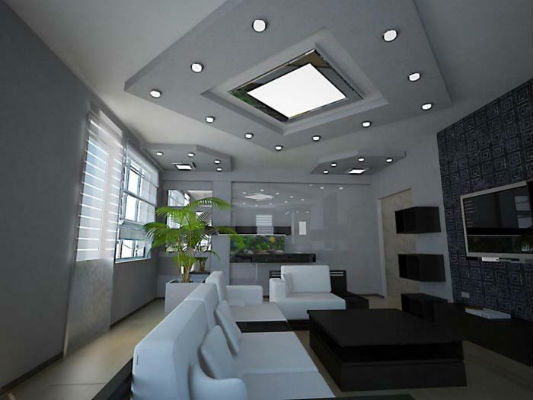
LED down lights have greatly improved over the last year or so.  There are many new brands on the market and prices have dropped by around 50%.

The new lights on offer are more compact, with the LED drivers built in to the light fitting instead of having a separate driver that plugs into the light.  This makes them easier to install, especially in confined spaces.

Some new LED downlights can even be completely covered by insulation without causing overheating problems.

Overheating is a big safety issue with the old style down lights.  The dichroic lamps burn at up to 300 degrees and there are restrictions on clearances to timber and flammable materials.

The safety regulations were often ignored and a large number of homes have been damaged by fire as a result.

Click Here to read our in-depth article on The Dangers Of Old Style Down Lights

LED down lights solve all the safety problems caused by old downlights as they run very cool in comparison.

LED down lights are also much cheaper to run and have much lower maintenance costs as well.

The quality of light output has improved dramatically, with fittings available from 8 watts to 15 watts, with a choice of warm white, neutral or cool white output, so it’s easy to find a suitable down light for your situation.

Many fittings are dimmable too, which gives you even more options.  The only proviso is you must match the correct dimmer to your light fitting to ensure the best result and avoid flickering or a limited dimming range.


There is also a choice in style and colour of the fittings themselves.  LED downlights are available in either white, brushed chrome or brass finish.  The diffuser on the front face can be slightly recessed or flush with the trim ring

LED down lights are available in sizes that will directly replace the common sizes of old style downlights so swapping over to new fittings is usually a straight forward job.

Switching to LED lights will save you at least 80% on running costs.  Depending on the amount you use the lights, the pay back time could be less than a year.  The more you use the lights, the more money you will save.

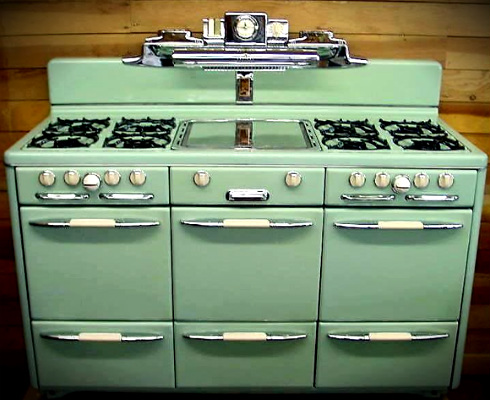
Does Your Stove Have An Anti Tilt Bracket?

Does Your Stove Have An Anti Tilt Bracket?

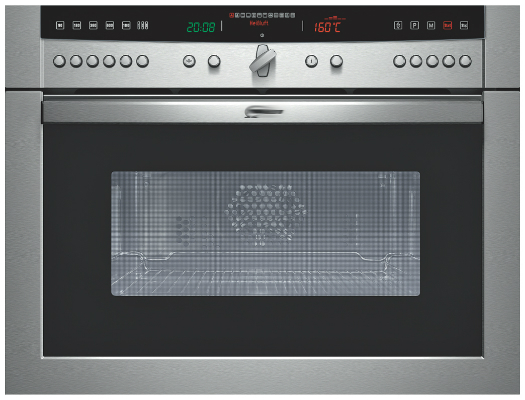
Anti Tilt Brackets Are Required To Be Fitted To All New Freestanding Stoves

A modern stove without an anti tilt bracket can easily tip forward, causing serious injury – usually to young children.

The most common type of injury happens when the young child pulls down the oven door and stands on the door as a step to get higher up.  The stove tilts forward, spilling boiling liquid onto the child, often causing horrendous injuries.

In order to prevent these injuries, all new stoves are supplied with an anti tilt bracket.  These metal brackets are usually designed to be screwed to the floor.  When the stove is pushed back against the wall the bracket locks onto the stove feet or a into slot in the back of the stove.

When the anti tilt bracket is correctly installed and the stove is pushed back against the wall, the bracket prevents the stove from tipping forward.  To comply with Australian Standards an anti tilt bracket should be able to withstand up to 50kg of weight applied to the door.

New stoves are much lighter compared to the old stoves they replace and most of the weight is at the top.   This means it is usually easier to tip over a new stove than an old one.

Currently, there is no requirement to fit an anti tilt bracket to an existing stove if it doesn’t have one.  But if you remove your old stove and install a new one you must fit the anti tilt device supplied by the manufacturer and according to the manufacturers instructions.

Some cheaper stoves have chains designed to be fixed to the wall behind the stove.  The chain system will only be effective if the chain is kept quite short and the end of the chain is fixed to a wall stud, not just screwed into the plaster.  The floor mounted anti tilt brackets are usually a better solution.

We have carried out repairs on plenty of fairly new stoves that have been installed without an anti tilt bracket.   Some installers are ignoring the regulations and installing new stoves without the brackets that prevent the stove tipping forward.

It is quicker and easier to toss the anti tilt bracket out with the stove packaging and pretend there is no such thing. However, any installer who does this is ignoring the manufacturers installation instructions and the Australian Standards and placing children’s lives at risk in order to save a few dollars.

When you get a new freestanding stove make sure your installer fits the correct anti tilt bracket to prevent the stove tipping, including the pin that prevents the stove sliding forward away from the anti tilt bracket.

When you book your job, make sure the installer you choose will remove your old stove and dispose of it free of charge!

And once your anti tilt bracket is securely fixed in place make sure you don’t leave pot handles hanging over the front of the stove where young children could reach up and grab them.

Cold Tassie Winter Leads To Flooded Ceilings

Cold Tassie Winter Leads To Flooded Ceilings

Frozen Pipes Cause Big Trouble For Home Owners
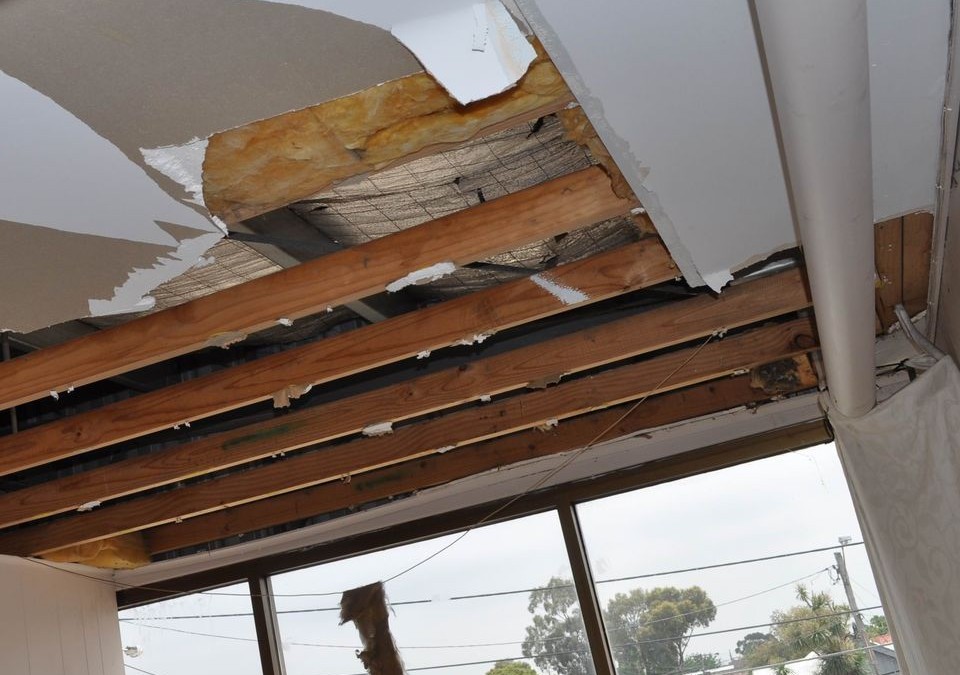
The cold winter of 2015 has seen a larger than usual number of homes flooded by frozen water pipes.

With temperatures falling well below zero, water pipes in some ceilings have frozen, causing joints to crack due to expansion of ice in the pipes.  When the ice melts the water flows again – into the ceiling space.

It’s just like running a hose into your ceiling and turning the tap on.  And then going away for the weekend.

A large proportion of the affected homes have been vacant.  Perhaps the heating has been turned off while the occupants are away for the weekend.  Maybe the water is more likely to freeze if the taps haven’t been used for a few days.

The fact that no-one is at home when the pipe breaks means that the water can be running for days before it is discovered.

In these cases, the damage can be quite extensive.  Ruined plaster and insulation and damaged light fittings, carpet, kitchen appliances, cupboards and furniture and more.

Imagine coming home from your weekend away to find the bedroom ceiling collapsed and a pile of sodden plaster and insulation soaking on top of your bed.


So How Can You Avoid This Disaster?

The best way to avoid a problem is to fit insulation to the bare copper pipes in your ceiling space.  The insulation is available as a foam tube that can be cut and slipped over existing pipes.  It’s quite cheap and readily available at plumbing supply stores.

Most burst pipes seem to occur when the house in unoccupied so if you are only going to be away for a couple of days consider leaving some heating on, rather than turning everything off.  Set your thermostat or timers to run you heater or heat pump just enough to keep the ceiling space above freezing.

If you are going away for the winter and the house will be empty, consider turning off the water at the mains, so that if a pipe were to burst, there will be very little water damage as a result.

If the worst does happen, turn off the water mains, turn off the power at your main switch and phone your insurance company.  They will organise the appropriate trades to attend and begin the process of repairs as required.

Dumbest Place To Install A Light Fitting

Dumbest Place To Install A Light Fitting

Poor Design Leads To Big Repair Bills
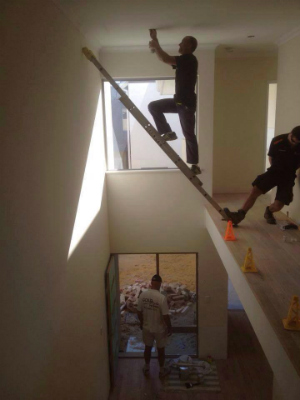
The photograph above shows a pretty dubious set up for installing a light fitting in the ceiling at the top of a stairwell. While the initial installation is risky, how on earth is anyone supposed to repair that light in years to come?

After these clowns have finished, a builder will fit a handrail around the walkway and there will be no easy way to get to that light even to do something as simple as replace a blown globe. (more…)

Loose Electrical Connections Are A Fire Hazard

Loose Electrical Connections Are A Fire Hazard

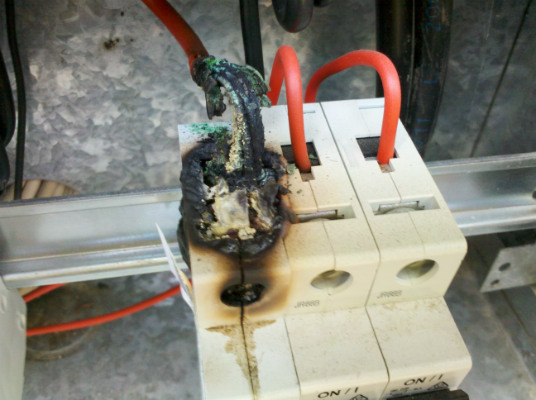
Loose Electrical Connections Get Hot, And This Could Be The Result.

Electrical connections can become loose for a variety of reasons.   A tightly made connection can become loose over time due to the tiny expansion and contraction that occurs as the cable warms up during use and cools down when not energised.  Perhaps the last tradesman to work on the installation didn’t do them up tight enough, or maybe the connecting parts have worn out and don’t make good contact anymore.

Occasionally we find connections that have never been tightened up at all.  The wire has been pushed into the terminal and the screw never tightened.   This can happen even in new homes and installations.  It’s a sign that the tradesman didn’t do a final check by pulling on each wire to make sure it’s solidly connected.

Sometime the connectors or terminals are faulty so even though the screw is done up tight it’s not actually clamping the cable enough.  Once again, a simple check by tugging on the wire will alert the tradesman to that type of fault.

Every electrical connection has the potential to get hot.  With increased heat comes increased electrical resistance, which in turns causes things to get even hotter.   Depending on the location of the connection this heat could potentially start a fire.

Common Locations

Common locations for loose electrical connections include switchboard connections of fuses and circuit breakers, connections to stove elements and hotplates and connections to power points.

The more load being drawn through the loose connection the more likely it is to fail.  For example a loose connection to a power point is more likely to be a problem if a heater is plugged in to the heater as compared to a phone charger or some other low wattage device.

Signs To Watch For

Signs that could indicate a loose electrical connection include flickering lights, intermittent power fluctuations, buzzing noises and burning smells.  If you do find any of these problems you should have an electrician check it out as soon as possible.

Common Lighting Faults

Common Lighting Faults

There are many possible causes of lighting faults.

From a simple blown globe to various wiring and light fitting faults to rodent damage and weather conditions, some faults are minor, some can be quite serious.

If your lights are flickering, dimming, sparking or turning on and off by themselves, you should call an electrician as these can be signs of potentially serious electrical problems.

Here are a few tips and ideas to help you identify the problem you may be experiencing and what you can do about it.

Don’t forget to check your power points as well.  This article describes lighting faults only.  If you have no power at all click here to see our information on power faults

Which Lights Are Out

First you should identify the extent of the problem.  How many lights are out?  Is it just one fitting, is it just part of the house, or are there no lights working anywhere at all?

Most homes have only one lighting circuit.  This means all the lights in the house are protected by one fuse or circuit breaker.  A problem with just one light fitting can blow the fuse or trip the circuit breaker and put all the lights out.

Lamps

If only one light is out, the first thing to check is the lamps.

Even for a seemingly simple job like changing a lamp, it’s a good idea to turn off the power to the lighting circuit by switching off the circuit breaker.

These days many lighting problems can be traced back to poor quality lamps.  If you put a new lamp in your light fitting and it blows immediately when you turn the light on it could be a problem with the wiring or the light fitting.

If you put a new lamp in and it only lasts a couple of days or a couple of weeks, then it’s more likely a problem with the poor quality of the lamps.  Even brand new lamps can be faulty.

See our article “Why do my light globes blow all the time” for more information.

You can always test a light fitting by removing a lamp from a fitting you know is working and installing it in the non working light.

If the light still doesn’t work it must be a problem with the light fitting itself.  In this case you will need to call an electrician.

A seemingly simple job like changing a light bulb can actually be quite dangerous under certain circumstances.

Most lights are high off the ground so you could be setting yourself up for a fall if you don’t have the correct equipment to access them.

In older houses a lot of lights are not earthed and so could be an electric shock hazard to anyone who touches them, when a fault occurs.

Reset The Circuit Breaker

If all your lights are out and you can’t identify an obviously faulty fitting, turn off all lights in the house and then try resetting the circuit breaker or reloading the fuse.

(Under these circumstances, circuit breakers are a great advantage over fuses because they are so easy to reset while carrying out the testing, compared to reloading a blown fuse each time.)

If the circuit breaker stays on after you reset it, go around the house turning on all the lights one by one.  If there is a faulty light fitting the circuit breaker will probably trip when you switch the faulty light on.

If this happens then you will need to call an electrician.  Make a note of which light is causing the problem and put a piece of tape over the switch to prevent it being turned on again.

Lighting problems can be time consuming to locate because all the lights are usually on one circuit.  Passing on useful and accurate information to your electrician will make their job quicker and easier and therefore cheaper for you.

Water Damage

Water in an outside light fitting is a common source of problems, especially if you have an earth-leakage circuit breaker (safety switch) protecting the circuit.  In this case turning the light off may not solve the problem as the safety switch can still detect a fault and turn itself off.

Heat Damage

Lamps with a screw-in type base can sometimes get stuck in the threaded lamp holder and when trying to screw them out you can actually be spinning the whole lamp holder and twisting the wires around behind it.

This is a dangerous situation as the wires can break or have the insulation damaged which could result in a short circuit, or even an electric shock for the person trying to change the lamp.

The fittings that are more susceptible to this problem are surface mounted spot lights which take an incandescent reflector lamp.  The lamps produce a lot of heat and can weld themselves into the lamp holder over time.

Sensor Lights

Sensor lights can fail due to moisture problems or be affected by a power spike.  This may cause them to not work at all or to stay on all the time.  A damaged sensor light cannot be repaired.  It will have to be replaced.

Rodent Damage

Rodent damaged wiring can be a serious problem in your roof space and may cause noticeable problems with your lights.  Click here for more information.

Old Wiring

Old rubber cable with crumbling insulation could also cause similar problems.  Click here for more information.

Other electrical items that may be connected to the lighting circuit include exhaust fans and sweep fans, bathroom Tastics and air-transfer fans.  If you can’t find a fault with your lights it may be a fan causing the problem.  Smoke detectors are also connected to your lighting circuit but do not generally cause a problem with lights tripping.

If you can’t locate and remedy the problem yourself, call an electrician as soon as possible.  Don’t attempt any electrical repairs yourself.

You don’t need to go to the expense of an after hours callout if your power points are still working.  You can get light from any lamp that can plug into a power point and that may be enough to get you by until an electrician can attend.

Be very careful with candles as they do present a higher risk of fire.  LED torches and lamps are reasonably cheap to buy and don’t use a lot of battery power so you should have a couple handy in case of power faults anyway.

Whatever you lighting fault, Mance Electrical can provide free advice and prompt service in Launceston and surrounding areas.

Call Now Button